Create an approval policy
Approval policies define who needs to approve what, and under what conditions. This page walks through creating a policy from scratch.
Only Administrators and Controllers can create approval policies.
Open the policy builder
-
In the top-right corner of any page, click your avatar (your initials or profile picture in a small circle). An overlay menu opens directly below the avatar.
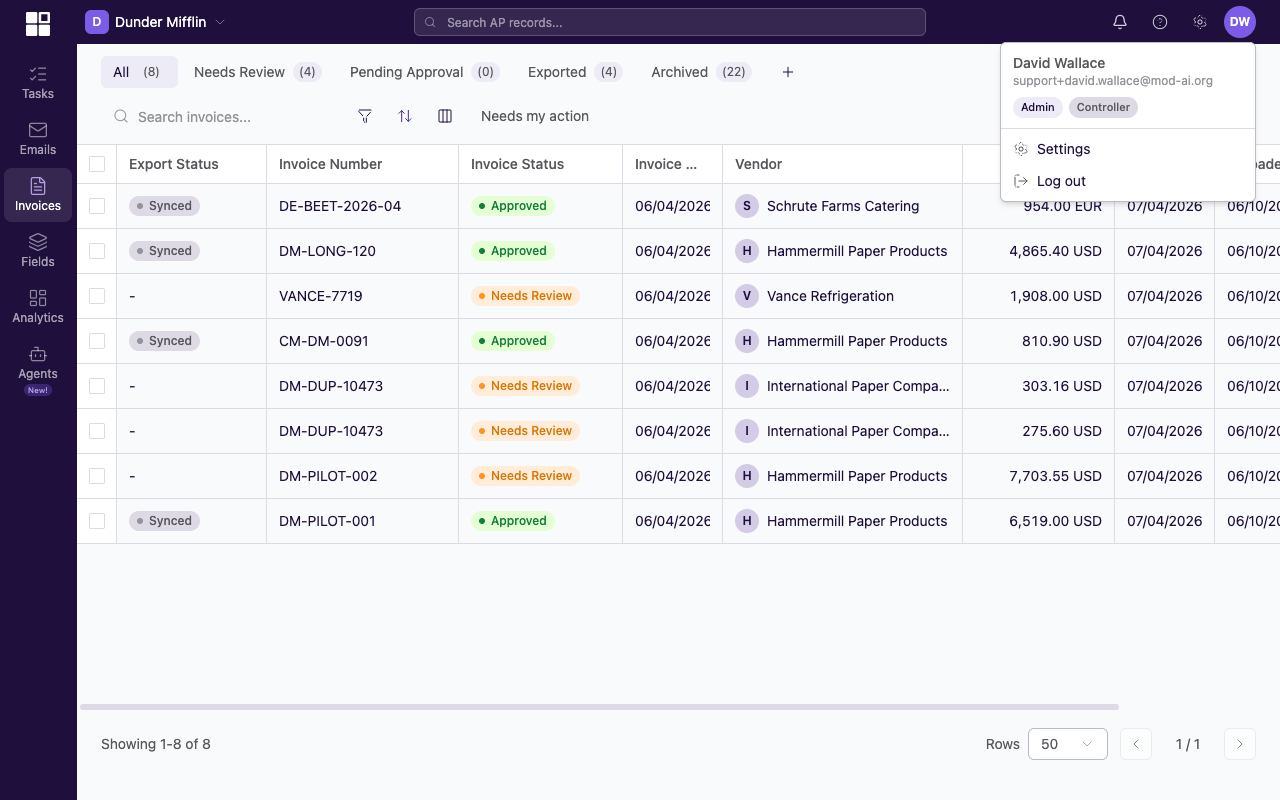
The avatar menu opens below-left of the avatar and contains only two clickable items: Settings (with a gear icon) and Log out. Click Settings.
-
The Settings page loads with a left-hand navigation pane organized into three tiers: My Settings, Organization, and Company.
-
Under the Company tier (the bottom group in the Settings left nav), click Approval policies. The Approval policies list page loads in the main content area on the right.
-
In the top-right of the Approval policies page, click the purple + Create Policy button. The Create Approval Policy dialog opens in the centre of the screen.
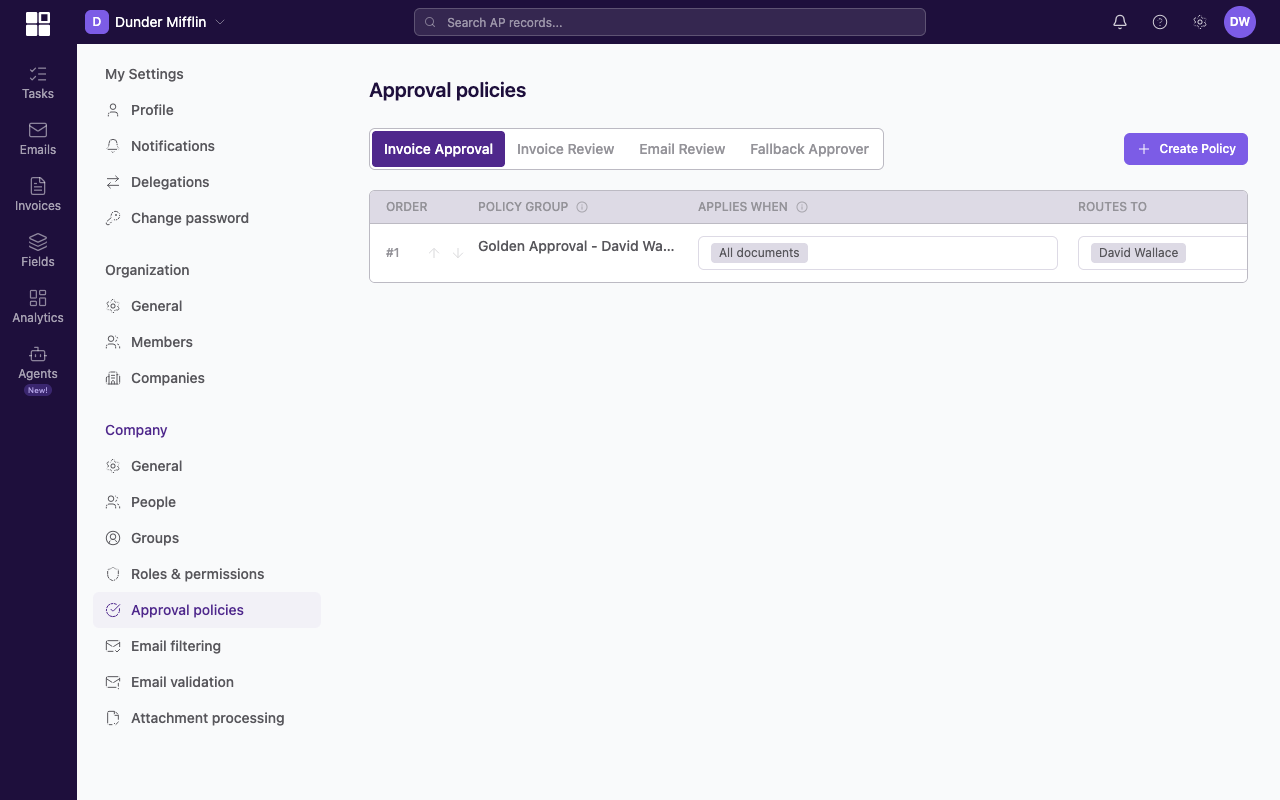
The + Create Policy button is the only purple button on this page and sits at the top-right of the content area, to the right of the Filter and Columns icons.
See the Create Approval Policy dialog before any fields are filled

Create Approval Policy dialog with Basic Information, Conditions, and Approval Steps sections plus the Active status indicator.
Name the policy
Give it a clear, descriptive name. Good names make it obvious what the policy does.
Good:
- "High Value Invoice Approval"
- "Vendor Credit Review"
- "Invoices Over $25K - VP Approval"
Avoid:
- "Policy 1"
- "New Policy"
Pick what it applies to
| Option | Description |
|---|---|
| All Invoices | Applies to every invoice, matched or unmatched. |
| Matched Invoices | Applies only to invoices matched to a PO. |
| Unmatched Invoices | Applies only to invoices without a PO match. |
| Vendor Credits | Applies to vendor credit documents. |
| Actions | Applies to actions that require approval. |
Add conditions
Conditions decide which documents trigger this policy. With no conditions, the policy applies to every document of the type you picked above.
Click Add Condition. Available types:
- Amount. Trigger on invoice total greater than, less than, or equal to a value.
- Vendor. Trigger for one or more specific vendors.
- Field value. Trigger on values in specific fields.
Multiple conditions combine with AND logic. Every condition must match.
Add approval steps
In the Create Approval Policy dialog, scroll to the Approval Steps section. The section is below Basic Information and Conditions. To add a step, click the + Add Step button on the right side of the Approval Steps heading. A new step card appears underneath, numbered (Step 1, Step 2, etc.).
For each step:
- The step card opens with the step name pre-filled as Step 1 (or Step 2, etc.) at the top, plus three small buttons on the right of that row: Move up, Move down, Remove step.
- Below the step name, the Step settings subsection contains a Group logic dropdown. Click the dropdown and pick either:
- Any group must approve — the step completes the moment any one approver group approves.
- All groups must approve — every approver group on the step must approve before the step completes.
- Below Step settings, the Approver groups subsection lets you add who approves. Click the Approver type dropdown on the first group row and pick either Specific Employee or Employee Group. Then click Search employees… (or Search groups…) and pick the right person or employee group. They appear as a pill in the row.
- To add another approver to the same group, click + Add Approver at the bottom of the group's row. To add a second independent group on the same step, click + Add Approver Group.
- The Required approvals number input on the right of the group controls how many approvers in that group must approve before the group's contribution to the step is satisfied. Default is 1.
For sequential approvals (manager first, then VP), click + Add Step at the bottom of the dialog to add Step 2 below Step 1. Step 1 must complete before Step 2 begins.
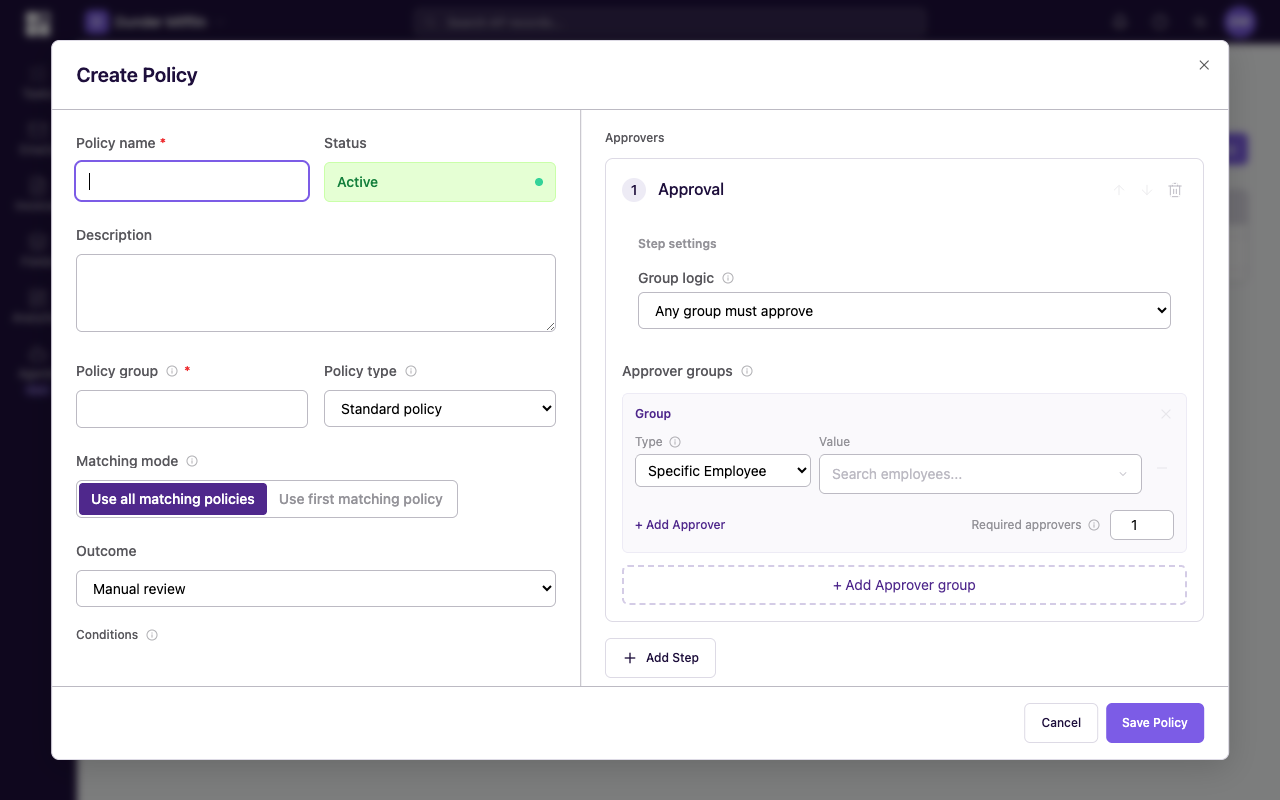
Step 1 occupies the right column of the dialog. The Group logic dropdown sits inside the Step settings sub-section; the Approver groups sub-section is directly below it.
Preview the chain
The Create Approval Policy dialog does not currently include a Preview routing action. To validate the chain before going live, see Routing Preview workarounds.
Save
Once the policy looks right, click the purple Create policy button at the bottom-right of the dialog (its label also shows the keyboard shortcut ⌘+⏎). A confirmation toast appears in the bottom-right of the screen reading Policy created, the dialog closes, and the new policy appears at the top of the Approval policies list. The policy is active immediately and applies to new documents going forward.
If you want to back out without saving, click Cancel at the bottom-left of the dialog or the × icon in the top-right corner. Nothing is created.
Real-world example
You want invoices over $5,000 to require manager approval, and invoices over $25,000 to also require VP approval after the manager.
Two policies:
Policy 1 (priority 1): "High Value - VP + Controller"
- Applies to: All Invoices.
- Condition: Amount greater than $25,000.
- Step 1: Controllers group (Any).
- Step 2: VP group (Any).
Policy 2 (priority 2): "Standard - Controller Approval"
- Applies to: All Invoices.
- Condition: Amount greater than $5,000.
- Step 1: Controllers group (Any).
Because Policy 1 has higher priority, a $30,000 invoice triggers the two-step chain. A $10,000 invoice falls through to Policy 2 (single-step manager approval). A $3,000 invoice matches neither and skips approval.
Priority
When several policies could match a document, only the highest-priority match applies. Mod AI stops evaluating after the first match.
That means order matters. Put your most specific, restrictive policies at higher priority and broader catch-alls at lower priority.
To change priority after creation, see Editing and Reordering Policies.
Start with simple policies. Add complexity as you see how your team uses approvals. You can always add conditions, steps, and policies later.