Upload invoices
Manual upload is one of two ways to get invoices into Mod AI. Use it for invoice files on your computer. For automatic intake over email, see Email Forwarding.
Before you start
You need the company:invoice:upload permission, which is included in the AP Specialist, Controller, and Administrator roles.
Upload an invoice
- In the left sidebar of the platform, click Invoices. The Invoices list page loads.
- In the top-right corner of the page (immediately to the left of your avatar), click the purple + New Invoice button. A dropdown menu opens directly below the button.
- The dropdown shows two options: Upload file and Manual entry. Click Upload file. Your computer's native file picker opens (Finder on macOS, File Explorer on Windows).
- In the file picker, navigate to the folder containing your invoice files. Select one file, or hold Shift (range) or Cmd / Ctrl (multi-select) to pick more than one. Click Open.
- The file picker closes and the upload starts automatically in the background. Each file becomes a new invoice in the Invoices list with status Processing while extraction runs.

New Invoice dropdown open in the top-right of the Invoices page, showing two menuitems: Upload file and Manual entry.
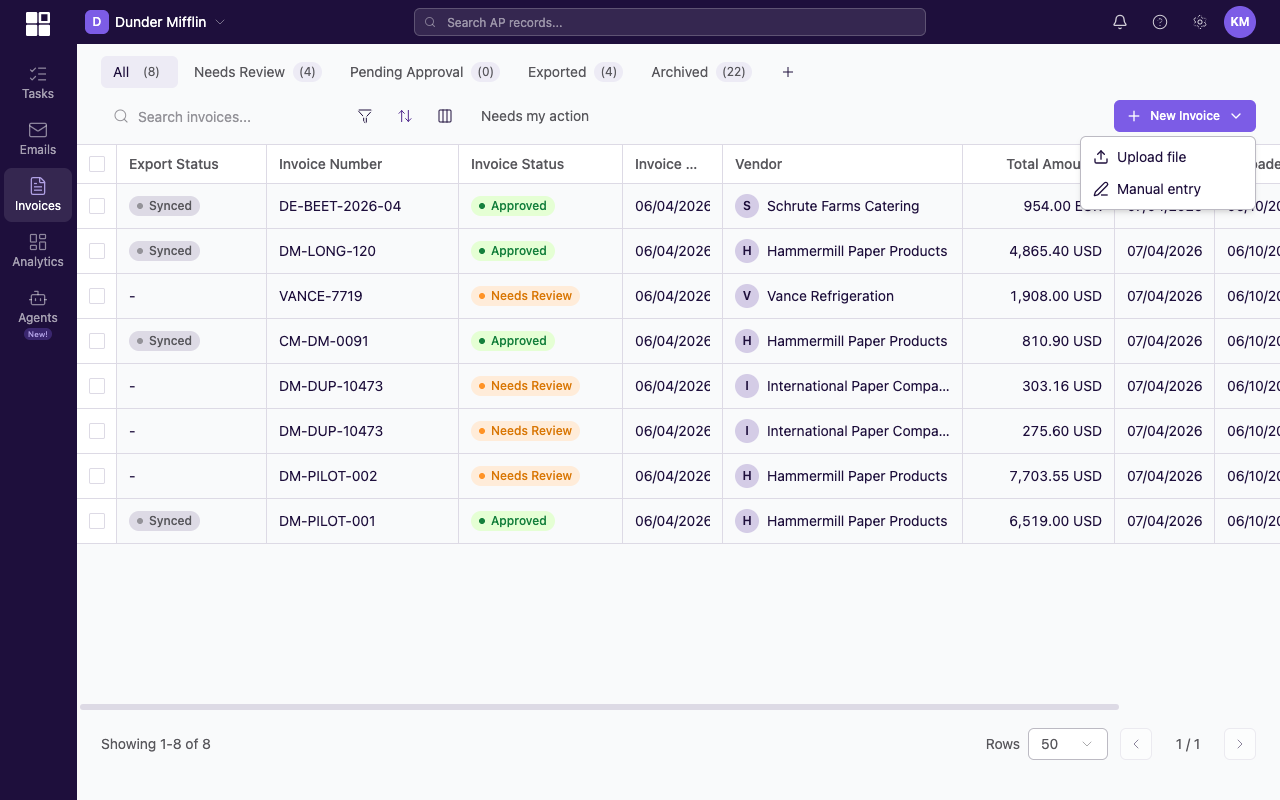
New Invoice dropdown open on the invoices list, showing Upload File and Manual entry options.
Mod AI doesn't render its own upload dialog in the browser. Clicking Upload file invokes your operating system's file picker directly. You don't see a drag-and-drop zone or a progress bar inside the app while the file uploads; instead, the new invoices appear in the Invoices list as soon as the upload completes, with status Processing as the agent reads them.
Supported formats
| Format | Extension |
|---|---|
.pdf | |
| PNG | .png |
| JPEG | .jpg, .jpeg |
| TIFF | .tiff, .tif |
| Word | .docx |
| Spreadsheet | .csv, .xlsx |
The agent also handles multi-language documents and low-quality formats (blurry scans, angled phone photos, poor lighting).
Upload clear, high-resolution files when you can. The agent recovers from poor quality, but cleaner inputs produce cleaner extractions. If you are scanning paper, use at least 300 DPI.
Bulk upload
Drag or select multiple files in one go. Each file becomes a separate invoice. There is no hard limit, but batches of 20 to 50 at a time work best.
What happens next
- Each file creates an invoice in Processing status.
- The agent runs extraction, reading the document and pulling out vendor, dates, amounts, line items, and more. See AI Extraction.
- When extraction finishes, the invoice moves to Needs Review.
- Validation rules and integration hooks run. Any issues surface as notices.
Processing time
Most invoices process in 30 to 60 seconds. Complex multi-page documents can take longer. The agent runs in the background, so you can navigate away and come back.
What you should see
After upload:
- The invoices appear in the Invoices list.
- Their status shows Processing, then Needs Review when extraction finishes.
- Any validation issues surface as notices on the invoice.
If something goes wrong
- If a file fails to upload, check the format is supported and the file is under your organization's size limit.
- If an invoice stays in Processing for more than a few minutes, check the activity log on the invoice. A processing error notice means the agent could not complete extraction.
- For a hands-free flow, set up email forwarding so vendors can send invoices directly without manual upload.