Review an invoice
The invoice detail page is where you review what the agent extracted, make corrections, resolve notices, and prepare the invoice for approval. This page covers every section of the detail view.
To open it, click any invoice in the invoices list.
Document viewer (left panel)
The left side shows the original invoice document. You can:
- Zoom in and out.
- Scroll through multi-page documents.
- Navigate pages with the page controls at the top of the viewer.
The viewer stays in sync as you review fields on the right, so you can compare the agent's output against the source document.
Page layout
The invoice detail page has three regions: a Document notices panel on the left side (between the breadcrumb and the document viewer), the document viewer that fills the left column, and the right panel that holds the AI Summary, Invoice Header, and the tabbed sections.
Left side, between the breadcrumb and the document viewer:
- Document notices panel: when validation rules, integration hooks, or notice triggers flag something, a panel appears here with header N Exceptions. Click to expand and resolve each notice. See Validation and notices panel below.
Right panel, top to bottom:
- AI Summary: the purple panel showing a structured briefing on the invoice — vendor context, what the invoice is for, and any issues the agent flagged. See AI Summary panel below.
- Invoice Header: extracted header fields (vendor, invoice number, dates, payment terms, totals, memo).
Tabbed sections at the bottom of the right panel (five tabs, in order):
- Items: line items entered as item-master references (when the vendor has a catalog of items).
- Expenses: line items entered as freeform expense lines, with description, quantity, unit price, GL account, and dimensions.
- Approvals: policy conditions, approval steps, and assigned approvers.
- Comments: user-added comments and internal notes on the invoice.
- Activity: the full change history (who changed what, when, and the before/after values).

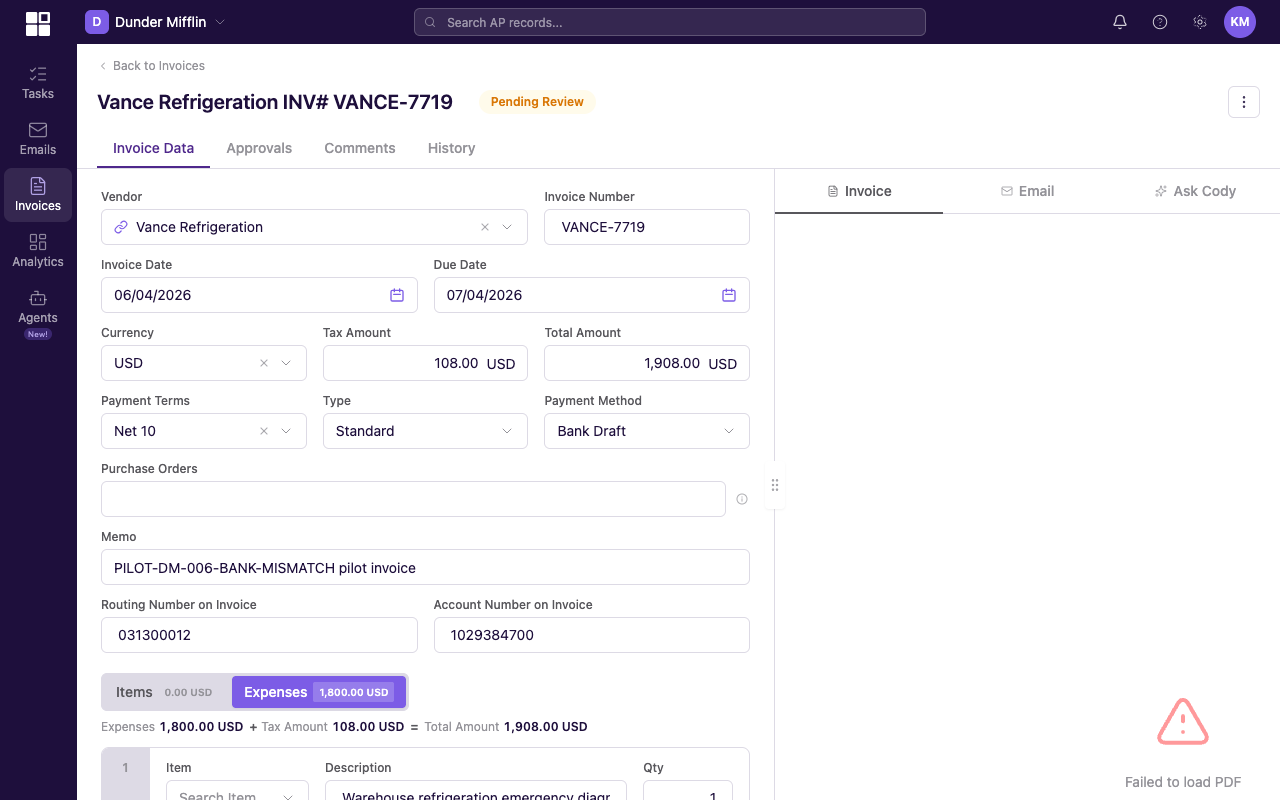
Invoice detail page on the Overview tab, document viewer on the left and header fields plus line items on the right.
Header fields
Invoice header fields with a low-confidence field visibly highlighted, signalling the agent is uncertain about that extraction.
- Vendor: the matched vendor. Click for vendor details.
- Invoice Number: extracted from the document.
- Invoice Date: when the invoice was issued.
- Due Date: the payment due date.
- Payment Terms: Net 30, Net 60, Due on Receipt, and so on.
- Currency: the invoice currency.
- Subtotal, Tax, Total Amount: the financial totals.
Verifying against the source document
Each header field row has a small purple Highlight on PDF icon at the right edge of the row (it looks like a magnifying glass over a document). Click the icon and the matching region on the PDF viewer to the left flashes purple for two seconds and scrolls into view, so you can verify the extracted value against the original.

This is the wider invoice detail page so you can see where Highlight on PDF icons live: each header field on the right side of the page has its own icon at the right edge of the field row. The PDF viewer on the left is where the matching region flashes purple after you click an icon.
Use this when a value looks unusual — invoice numbers, dates, or amounts that don't match what you'd expect. The highlight shows you exactly which part of the document the agent read.
Editing fields
Click any field to edit. A text input appears; press Enter or click away to save. Your corrections save immediately and feed future extraction accuracy for this vendor.
Line items

Line items table with the GL account dropdown open on one row, showing the configured GL values.
Below the header, the line items table shows:
- Description of what was purchased.
- Quantity.
- Unit Price.
- Line total.
- GL account (see GL Coding).
- Dimensions (department, cost center, project, and others, per your dimensions setup).
Click a cell to edit. GL accounts and dimensions use dropdown selectors backed by your configured values.
Add a line with Add Line Item. Remove one with the delete icon on the row.
AI Summary panel
The AI Summary is a purple panel always visible in the right side of the invoice detail page, above the Invoice Header. It gives a structured briefing on the invoice: vendor context, what the invoice is for, and any issues the agent flagged. Notices generated by validation rules appear separately in the Document notices panel on the LEFT side of the page (see Validation and notices panel) — they do not appear above the AI Summary.
Issues in the panel are color-coded by severity:
- Red — errors (something the agent is confident is wrong, like a vendor mismatch or a bank-detail anomaly).
- Yellow — warnings (something worth a second look, like an unusual amount compared to prior invoices).
- Blue — informational (context that may matter, like a first-time vendor).
For the full breakdown of what the panel covers and how to use it during review, see AI Summary.
Validation and notices panel
When validation rules, integration hooks, or notice triggers flag something on an invoice, a Document notices panel appears on the left side of the invoice detail page, between the breadcrumb and the document viewer. Its header reads N Exceptions (where N is the count). Click the header to expand; each notice appears as its own row with a short label, the field it affects, and the action to take.
The Document notices panel is the small bordered box on the left side under the breadcrumb. Earlier versions of this article described a Validation Failed panel on the right rail; the current platform places notices on the LEFT.
The panel covers:
- Validation rule failures — system rules like duplicate-invoice detection, line-item three-way match, or duplicate-credit-memo.
- Integration hook failures — per-customer checks defined in
worker/hooks/(e.g., NetSuite tenant-specific validations). - Notices — structured exception types that surface in the panel by name. The eight notice types group into two families (see Validation > Notices overview):
- Core: Duplicate Invoice, Duplicate Credit Memo, Processing Error, Validation Failure, Price Change Detected.
- PO consumption: PO approaching consumption (warning), PO fully consumed (info), PO overconsumed (warning). Tenant-hook-driven; appear when matched PO lines push the PO toward, at, or past its authorized capacity.
If validation has blocking errors, the invoice holds until you fix them and re-run validation. Click the Validate button in the action bar at the top-right of the invoice detail page (the action bar shows Reject / Submit / Hold / Validate / Cancel Invoice — Validate only appears when validation errors are active). See Soft Revalidation.
Approvals tab
Once an invoice is submitted for approval, this tab shows:
- The policy that matched.
- The approval chain: each step, the assigned approver, and the status of that step.
- Any routing overrides or delegations in effect.
See How Approvals Work.
Comments tab
The Comments tab is where you leave internal notes for the team. Use it to flag something for a colleague, add context for a correction, note that you called the vendor, or any other free-text annotation. Comments don't change invoice data — they're conversation around it.
Activity tab
The Activity tab is the invoice's full change history:
- Who made each change.
- Which field changed.
- The old value and the new value.
- When the change happened.
It's a read-only, append-only audit log of every modification on the invoice.
Copilot chat bar
At the bottom of the invoice detail page, the Copilot chat bar lets you fix fields in natural language. Type something like "reassign all line items to GL account 5200" and the agent generates a diff for you to accept or reject. See Copilot.