Configure roles and permissions
Beyond the five built-in entity roles (Administrator, Controller, AP Specialist, Approver, Auditor), an entity Administrator can create custom roles with specific permission sets. This page covers the role editor.
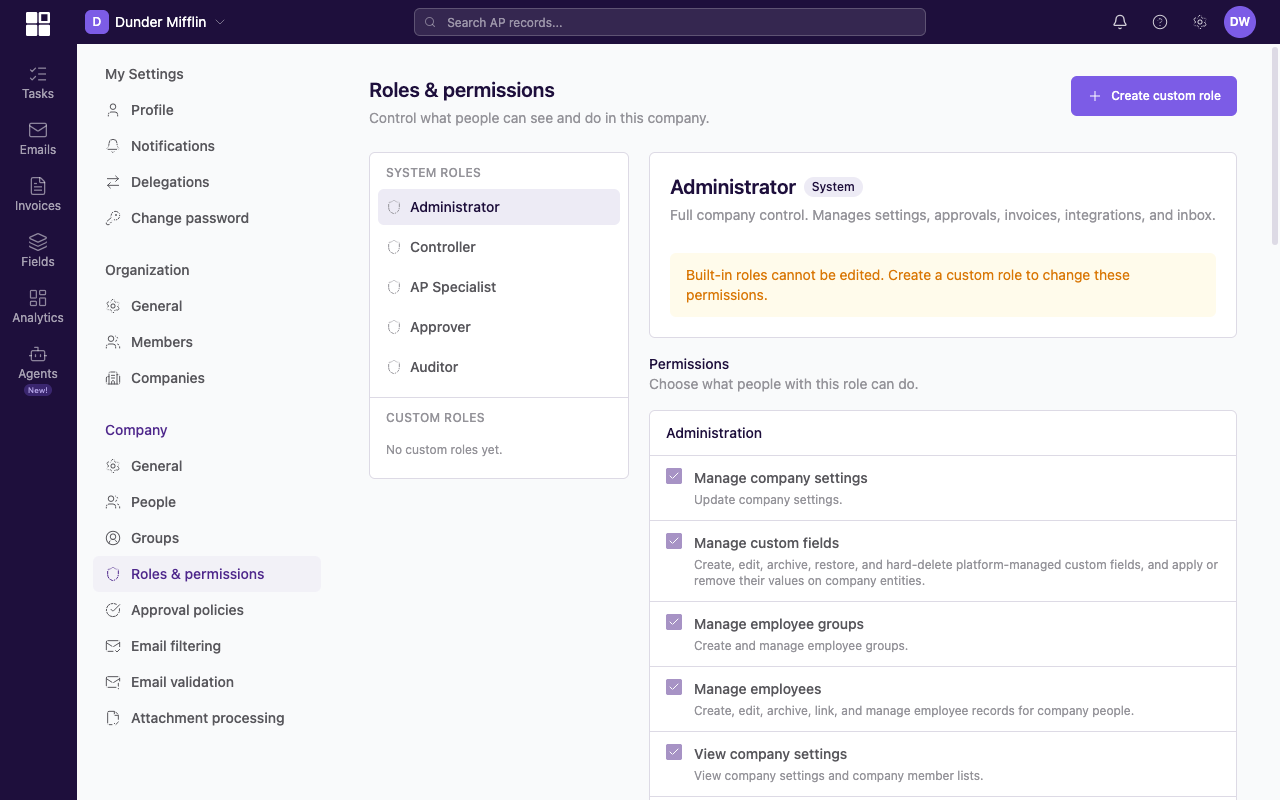
Roles & permissions page showing a role's display name, role key, assignable toggle, description, and permission category list.
Only entity Administrators can configure roles.
Open the role editor
- If you belong to more than one company, first switch to the one you want to edit roles for. Use the company switcher in the top-left of the page (it shows the current company's name with a small downward chevron next to it). Click the switcher, pick the right company.
- In the top-right corner, click your avatar, then click Settings in the avatar overlay menu.
- In the left-hand Settings nav, under the Company tier (the bottom group), click Roles & permissions.
- The Roles & permissions page loads in the main content area on the right. It lists every role on the company (built-in plus custom) and shows the count of permissions each one has.
The permission matrix
Each permission follows the format scope:domain:action, where scope is company for company-level (entity-level) permissions or primary for organization-wide permissions. Examples:
company:invoice:assigncompany:invoice:uploadcompany:approvals:managecompany:agent_instructions:managecompany:chart_of_accounts:managecompany:settings:managecompany:vendor:contact
For the full list, see User Roles and the granular permission tables on each feature page.
Built-in roles
Built-in roles cannot be deleted or edited. They define the standard access patterns most organizations use.
- Administrator (every permission via the
company:*wildcard). - Controller (full invoice lifecycle plus approvals:manage and agent_instructions:manage, but not settings:manage or user management).
- Approver (view plus approve permissions).
- AP Specialist (full invoice lifecycle including approve and reject, plus inbound email triage and agent_instructions:manage; no settings or user management).
- Auditor (view-only).
If a built-in role does not exactly match your needs, create a custom role.
Create a custom role
- Navigate to Roles & permissions as described above.
- Click the Create Role button on the Roles & permissions page (the primary action button, typically purple, in the top-right of the page).
- The Create Role dialog opens. In the Name field, type a clear name describing what the role does — for example, Inventory Coder, Senior Reviewer. Avoid generic names like Role 1.
- Below the name, you'll see the permission matrix organized by category (Agent Instructions, Approvals, Chart Of Accounts, Dashboard, etc.). Each row is a permission; each has a checkbox. Check every permission you want this role to have.
- Click the primary Save button at the bottom of the dialog. The new role appears in the Roles list. Per-entity role assignments are currently handled by your Mod AI implementation manager (see Manage entity users); the new role can be requested by name once it's created here.
Edit a custom role
- Click the role on the Roles page.
- Adjust the permission set.
- Save.
The change applies immediately. Users with this role see updated permissions on their next page load.
Delete a custom role
You can only delete custom roles that no user currently holds.
- Reassign anyone holding the role.
- Open the role.
- Click Delete Role.
- Confirm.
When to create a custom role
Most organizations are well-served by the built-in five. Create a custom role when:
- A team member needs more than an AP Specialist but less than a Controller (for example, a senior reviewer who can approve under a low threshold but not export).
- An external user (auditor, consultant) needs read-only on specific surfaces but not others.
- A specialized role (like an inventory or items team member) needs unusual permission combinations.
Resist creating custom roles for one-off cases. Each new role is more configuration to maintain.